|
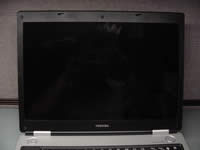
Toshiba Satellite M45, M40 and Tecra A4 screen removal. |
|
|
 |
STEP 1
Remove four LCD mask seals.
Remove four screws hidden under seals. |
| |
|
 |
STEP 2
Put your fingers between the mask and the LCD screen and carefully release the mask latches. |
| |
|
|
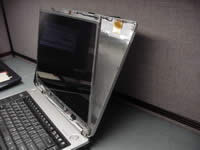
STEP 3
Remove the mask. Do not hurry; twist the mask slightly to release the latches. |
| |
|
|
STEP 4
Removed 2 screws securing the LCD screen to the display cover. |
| |
|
 |
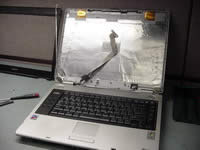
STEP 5
In this case, the data cable is glued to the LCD screen. Disconnect the display cable.
Lift the LCD cable off the display carefully.
|
| |
|
 |
STEP 6
Remove three screws on each side of the LCD screen and remove it.
Carefully place LCD screen on the palmrest.
|
| |
|
|
STEP 7
Remove one screw securing the FL inverter board.
Disconnect the cables from the FL inverter board on both sides.
Remove LCD screen and FL inverter. |
| |
|
 |
STEP 8
Now you can install new replacement parts and assemble the laptop back together.
Here are the bottom case disassembly instructions. |
| |
|
|
|


