|
Toshiba Portege R500 disassembly.
|
|
|
 |
STEP 1
Unplug the power adapter.
Unlock and
remove laptop battery.
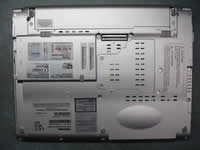
Remove two screws securing the memory cover and remove the cover. |
| |
|
 |
STEP 2
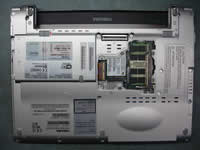
I'm not removing the memory module because it's not necessary for this repair.
Remove all marked screws from the bottom of the laptop.
|
| |
|
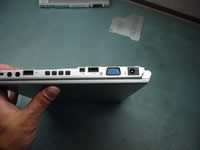 |
STEP 3
Remove one more screw on the side. |
| |
|
 |
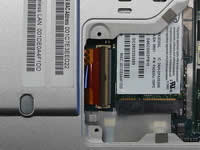
STEP 4
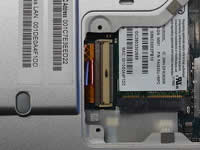
Before you disconnect the PCMCIA slot cable you'll have to unlock the connector.
Carefully lift the brown part of the connector up so it stays at a 90 degree angle. |
| |
|
 |
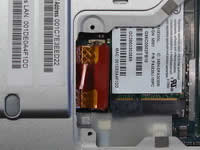
STEP 5
The connector unlocked.
Release the tab so you can grab it with your fingers.
|
| |
|
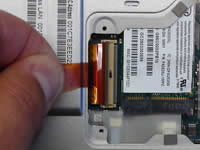 |
STEP 6
Pull the cable from the connector. |
| |
|
 |
STEP 7
The PCMCIA cable has been removed from the connector. |
| |
|
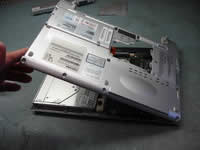 |
STEP 8
Start lifting up the laptop base from the left side.
Remove the base assembly.
|
| |
|
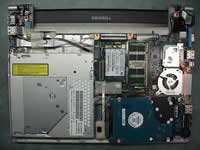 |
STEP 9
The laptop base has been removed.
Now you can access hard drive, DVD drive, wireless card, cooling fan, audio board and other parts. |
| |
|
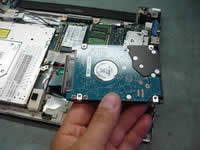 |
STEP 10
Carefully lift up the hard drive and disconnect the cable.
Now you can replace the hard drive.
As you see, this small laptop has a regular size hard drive.
You can replace it with another SATA hard drive.
|
| |
|
| |
|


