|
Toshiba Satellite 2435 screen removal. |
|
|
 |
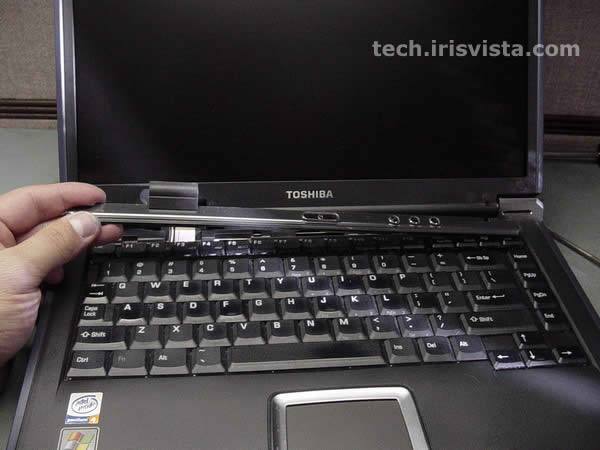
STEP 1
Insert a thin object under the securing strip and lift it up.
Be careful, it may be very tight. |
| |
|
 |
STEP 2
Remove the securing strip. |
| |
|
|
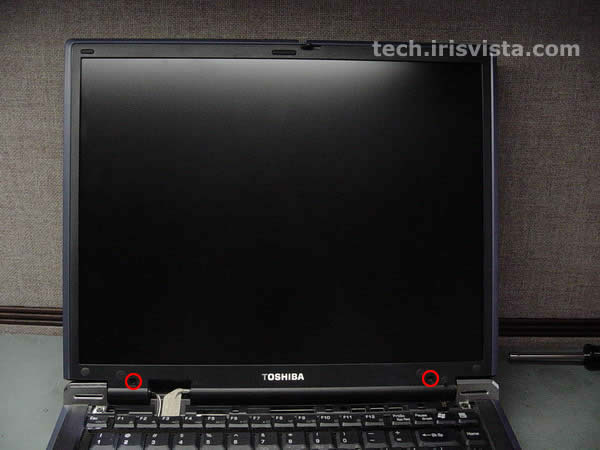
STEP 3
Remove two LCD mask seals.
Remove two screws hidden under seals. |
| |
|
|
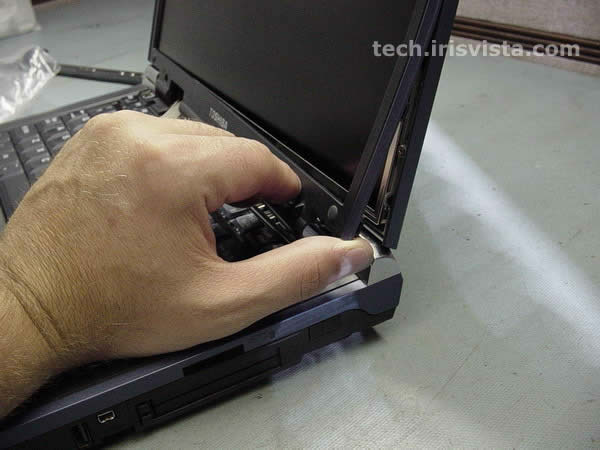
STEP 4
Put your fingers between the mask and the LCD screen and carefully release the mask latches. |
| |
|
 |
STEP 5
Remove the mask. Do not hurry; twist the mask slightly to release latches.
|
| |
|
 |
STEP 6
Removed 6 screws securing the LCD screen.
|
| |
|
|
STEP 7
Lift the LCD screen off the cover.
Remove the securing tape from the display connector.
Disconnect the display cable. |
| |
|
 |
STEP 8
Remove two screws securing the FL inverter. |
| |
|
 |
STEP 9
Lift off the FL inverter board.
Disconnect FL inverter cables on both ends.
Remove the FL inverter.
Remove the LCD screen. |
| |
|
 |
STEP 10
DONE! |
| |
|
|
|