|
Toshiba Satellite M45, M40, Tecra A4 disassembly. |
|
|
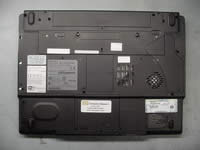 |
STEP 1
Turn the laptop over, unlock the battery and remove if from the battery bay.
|
| |
|
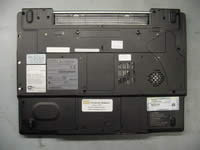 |
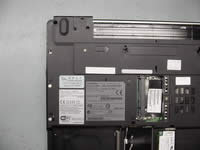
STEP 2
Remove two screws from the hard drive cover, one screw from the modem cover, one screw from the wireless card cover and one screw from the laptop heatsink cover.
Lift all covers from the laptop.
|
| |
|
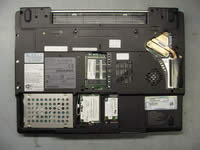 |
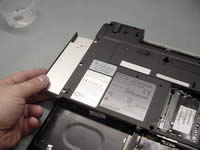
STEP 3
Remove the hard drive from the HDD bay.
Remove both memory modules.
Carefully disconnect wireless card antenna cables and remove the Wi-Fi card. |
| |
|
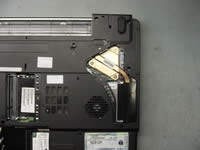 |
STEP 4
Unscrew three screws securing the laptop heatsink to the system board. |
| |
|
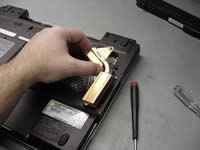 |
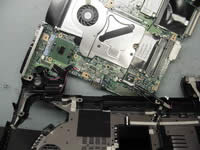
STEP 5
Remove the heatsink from the laptop.
|
| |
|
 |
STEP 6
DVD drive is secured in the laptop by one screw.
Remove the screw.
|
| |
|
 |
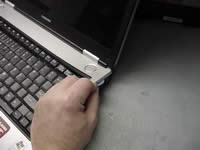
STEP 7
Using a sharp object slide the DVD drive from the laptop and remove it.
|
| |
|
|
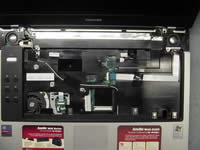
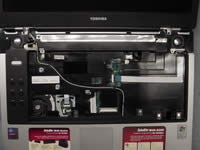
STEP 8
Remove fifteen screws securing the base assembly to the top cover assembly. |
| |
|
 |
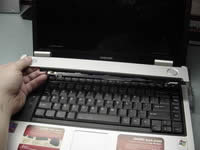
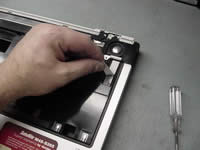
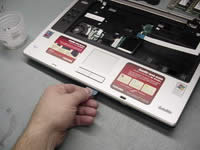
STEP 9
It's kind of hard to remove the keyboard securing strip from this laptop.
Use a guitar pick to release latches on the strip side first.
Release the rest of the latches with your fingers.
|
| |
|
 |
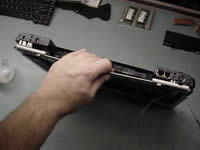
STEP 10
Remove the keyboard securing strip.
|
| |
|
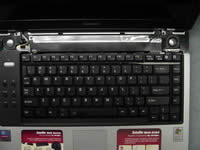 |
STEP 11
To remove the keyboard from the laptop, remove two screws on the top of the keyboard. |
| |
|
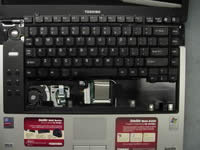 |
STEP 12
Move the keyboard away from the touchpad to get access to the keyboard cable.
Disconnect the cable on the system board.
Remove the keyboard. |
| |
|
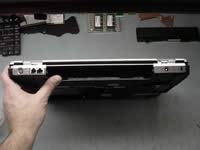 |
STEP 13
Close the laptop lid and turn it over.
Remove four screws securing the LCD display on the back of the notebook.
|
| |
|
 |
STEP 14
Turn tha laptop the right side up and open the lid.
Remove the black tape securing the wireless antenna cables and the USB board cable.
|
| |
|
 |
STEP 15
Remove two screws securing the LCD display assembly to the laptop base.
Disconnect the video data cable on the system board.
Pull the wireless antenna cables through the opening in the top cover. |
| |
|
|
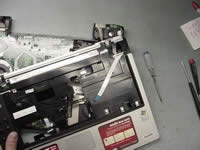
STEP 16
Carefully lift the laptop display assembly up and remove it from the laptop.
Visit another guide for screen removal instrucitons.
|
| |
|
 |
STEP 17
Unplug the touchpad cable and the switch board cable on the system board.
Unplug the I/O board (USB board) cable on the system board.
|
| |
|
 |
STEP 18
The USB board cable is glued to the top cover assembly.
You have to lift it up before you remove the top cover assembly.
|
| |
|
 |
STEP 19
Close the laptop display lid and turn the unit over.
Start to separate the laptop base and the top cover assembly from the back of the laptop. |
| |
|
 |
STEP 20
To release the latches, use a guitar pick.
Move it alone the edge to separate the top cover and the notebook base. |
| |
|
 |
STEP 21
Remove the top cover assembly.
Be careful with the USB board cable; pull it through the opening in the top cover.
|
| |
|
 |
STEP 22
Lift the right speaker and the modem/LAN ports off the notebook base.
Remove one screw securing the I/O board (USB board) to the base and remove it.
|
| |
|
 |
STEP 23
Disconnect the right and left speakers on the system board.
Remove two screws securing the system board to the laptop base.
|
| |
|
|
STEP 24
Start removing the system board from the right side.
Be careful some cables are still connected on the other side of the system board.
|
| |
|
 |
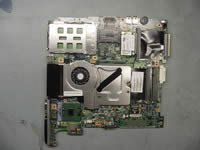
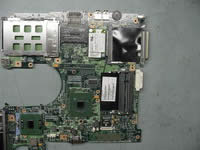
STEP 25
Turn the system board over and place it on the desk.
Remove the black tape securing the DC-IN jack cables to the system board. Disconnect the power cables from the system board.
Disconnect the modem/LAN cables on the system board.
|
| |
|
 |
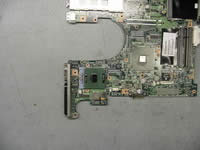
STEP 26
Release two black plastic latches securing the North Bridge to the system board.
|
| |
|
 |
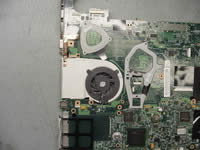
STEP 27
Turn the system board over and loosen two screws securing the cooling module.
Disconnect the fan cable on the system board. |
| |
|
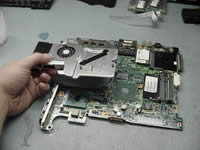 |
STEP 28
Lift off and remove the laptop North Bridge cooling module.
|
| |
|
 |
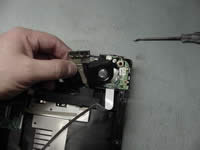
STEP 29
Remove two screws securing the modem card to the system board.
Disconnect the modem cable on the system board.
Remove the notebook modem card with the cable.
|
| |
|
 |
STEP 30
Unlock the CPU and carefully lift it off.
|
| |
|
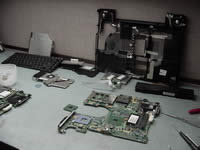 |
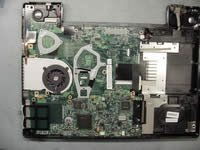
STEP 31
Done! Toshiba Satellite M45 is disassembled.
|
| |
|
|
|


