|
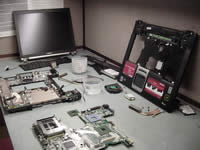
Toshiba Tecra S2 disassembly.
|
|
|
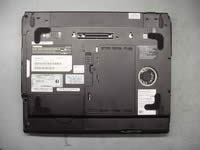 |
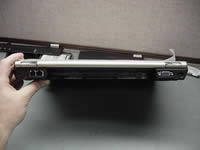
STEP 1
First of all, pull the battery from the laptop.
|
| |
|
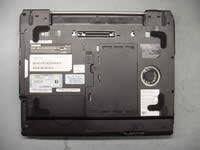 |
STEP 2
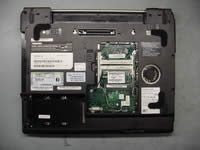
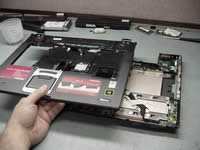
Remove one screw securing the hard drive cover and remove it from the laptop.
Remove one screw securing the memory, modem and wi-fi card cover and remove the cover.
|
| |
|
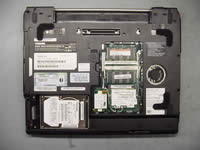 |
STEP 3
To remove the hard drive, slide it away from the connector and lift it up.
Remove both memory sticks.
Disconnect the wireless card antenna cables and remove the wireless card.
Remove two screws securing the modem card, lift it up and disconnect the cable on the modem. |
| |
|
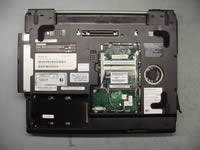 |
STEP 4
Slide the DVD drive away from the laptop and remove it.
Remove the rubber card reader cover. |
| |
|
 |
STEP 5
Remove all screw on the buttom of the laptop. |
| |
|
 |
STEP 6
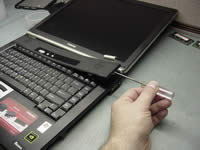
Turn the laptop the right side up.
Using a screwdriver lift up the keyboard securing strip and carefully release the latches securing the strip. |
| |
|
 |
STEP 7
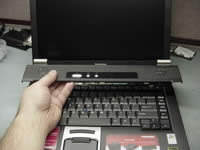
Remove the keyboard securing strip. |
| |
|
 |
STEP 8
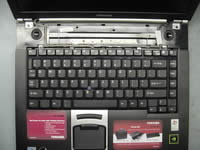
Remove two screws securing the keyboard.
Turn the keyboard over and place it upside down on the palmrest. |
| |
|
|
STEP 9
Disconnect the keyboard flat cable on the system board and remove the keyboard.
|
| |
|
 |
STEP 10
Close the lid and remove two screws on the back of the laptop. |
| |
|
 |
STEP 11
Remove two screws securing the display hinges.
Disconnect the video cable on the laptop VGA board and remove the cable from its route.
Remove the tape securing the Wi-Fi antenna cables to the top cover. Pull the antenna cables through the opening in the top cover.
Remove Wi-Fi antenna cables from its route on the top cover. |
| |
|
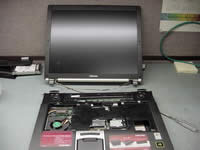 |
STEP 12
Lift up the laptop LCD assembly from the base and remove it.
|
| |
|
 |
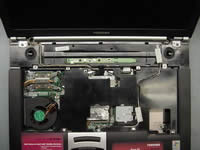
STEP 13
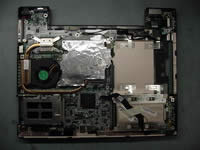
Remove six screws securing the top cover assembly to the laptop base.
Disconnect the power switch board cable, the speaker cable, the touchpad cable on the system board. |
| |
|
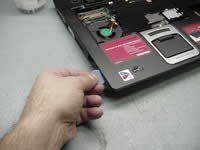 |
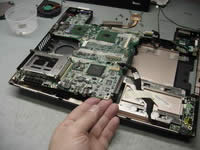
STEP 14
To separate the top cover assembly and the laptop base you can use a guitar pick.
Put the guitar pick between the top cover and the laptop base and move it along the side to release the latches. |
| |
|
 |
STEP 15
Remove the top cover assembly. |
| |
|
 |
STEP 16
Carefully lift up the VGA (video) board to disconnect it from the system board. |
| |
|
 |
STEP 17
Remove the laptop video board. |
| |
|
|
STEP 18
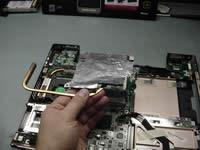
Remove three screws securing the CPU fan and disconnect the cable on the system board.
Lift up the fan from the laptop.
|
| |
|
 |
STEP 19
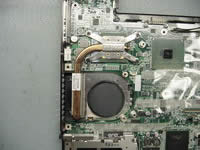
Remove four screws securing the CPU heatsink.
Lift up the heatsink and remove it. |
| |
|
 |
STEP 20
Before you can remove the system board, you have to remove four hex screws on the side of the laptop.
You'll need 3/16 Nutdriver. |
| |
|
 |
STEP 21
Disconnect the LAN board cable on the system board.
Disconnect the modem cable on the system board and pull the cable through the opening in the system board.
Disconnect the USB board cable on the system board. |
| |
|
 |
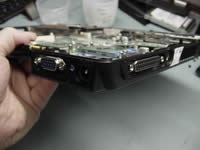
STEP 22
Be careful when you remove the system board.
The plastic piece around external VGA port is very fragile.
|
| |
|
 |
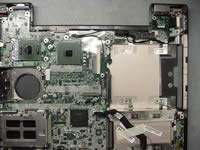
STEP 23
Carefully lift up the system board and remove if from the laptop base.
|
| |
|
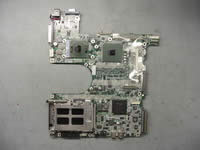 |
STEP 24
Unlock the CPU and remove it from the socket. |
| |
|
 |
STEP 25
Toshiba Tecra S2 disassembly done. |
| |
|
|
|


